Last week, in my public speaking class with 10th graders, I worked on how to create diagrams for presentations. For this class, I needed students to understand what a diagram was and learn about the different types, so they could plan one and design one- in the same class! I had a 70 minute class, which in reality is 60, so I planned an in-class flip which consisted of three sequenced stations with the following activities:
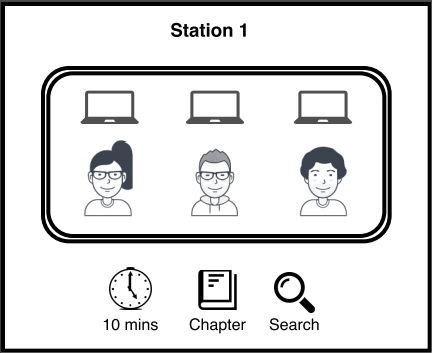
Station 1
Interaction: Individual
Materials: 1 laptop per student
Time: 10 minutes
Instructions:
Using the laptops:
1) Find the definition of diagram
2) Read a chapter about types of diagrams for presentations.

Station 2
Interaction: Groups of 3
Materials: notebooks
Time: 10 minutes
Instructions:
1) Read the description of a teaching method and discuss how you would design a diagram to explain it.
2) Take notes of your ideas.
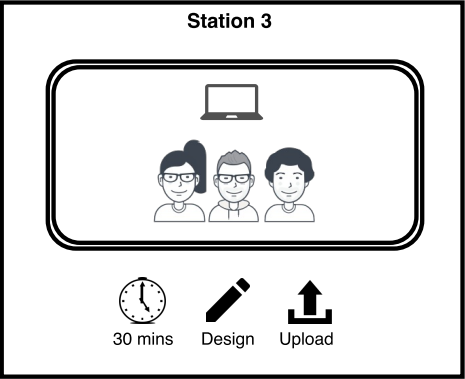
Station 3:
Interaction: Groups of 3
Materials: One laptop per group
Time: 30 mins
Instructions:
1) Design a diagram taking into account all the information provided in the teaching method description.2) Upload it to the class platform
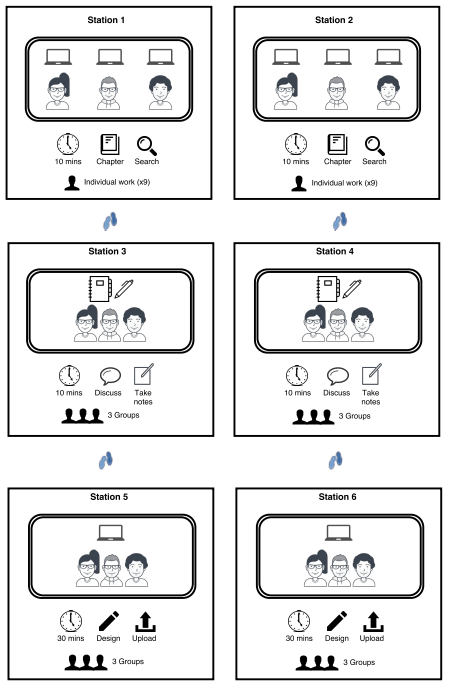
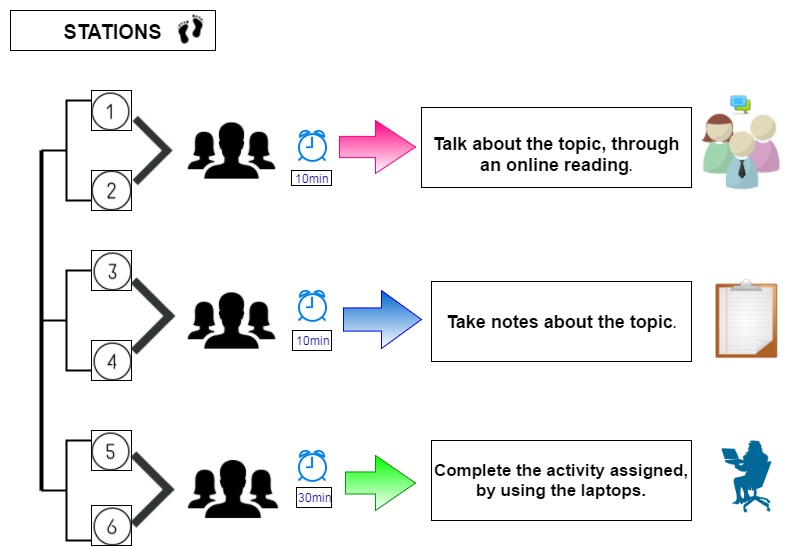
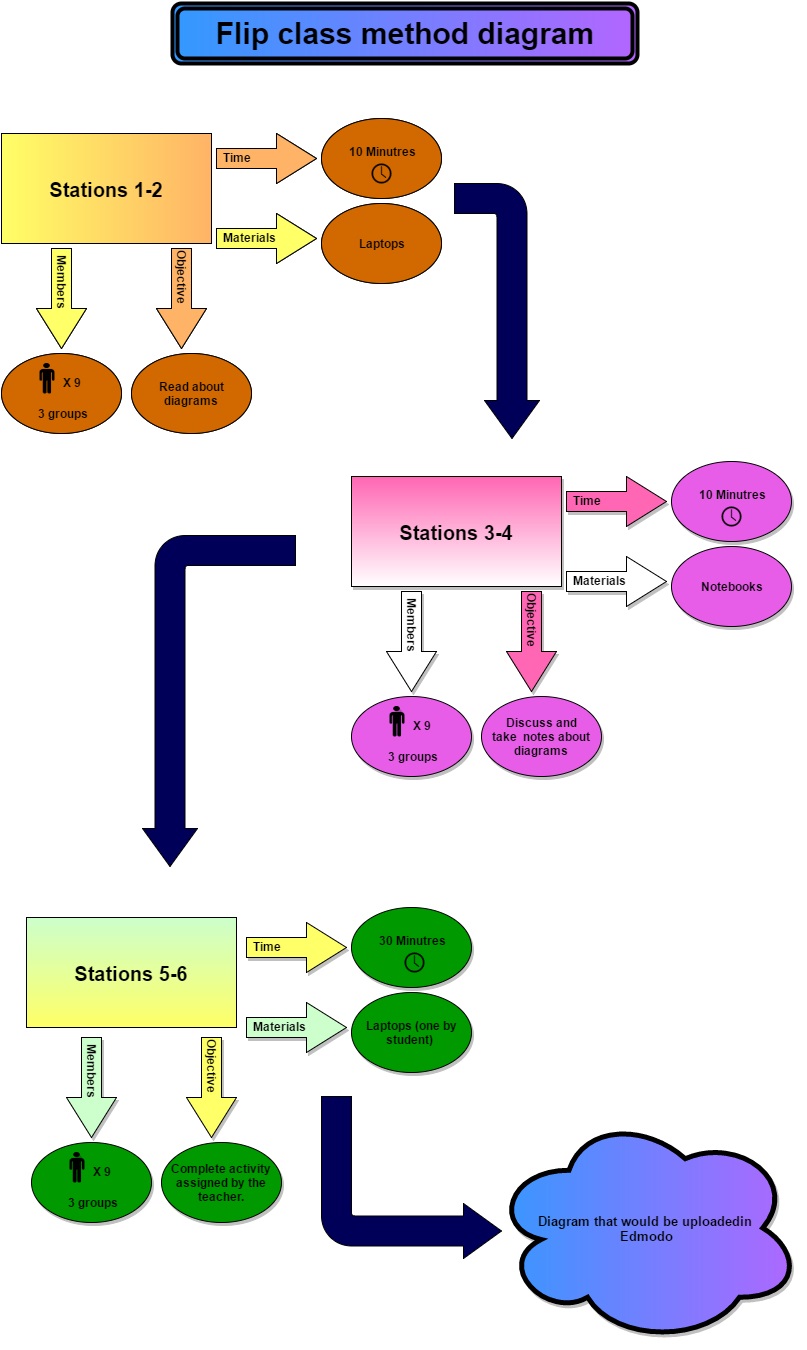
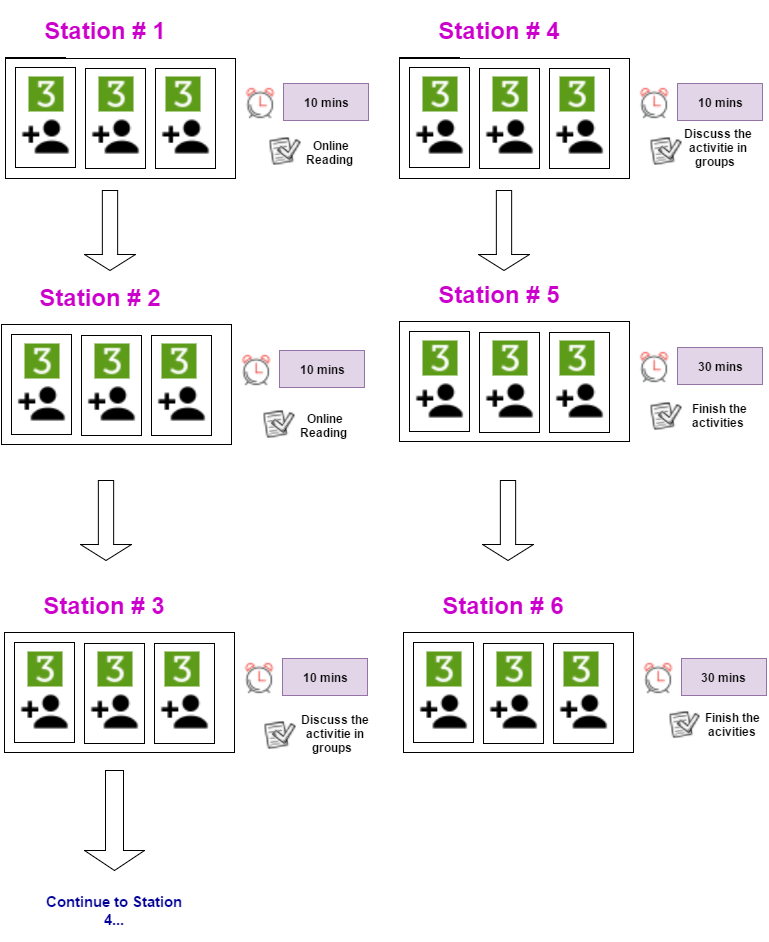
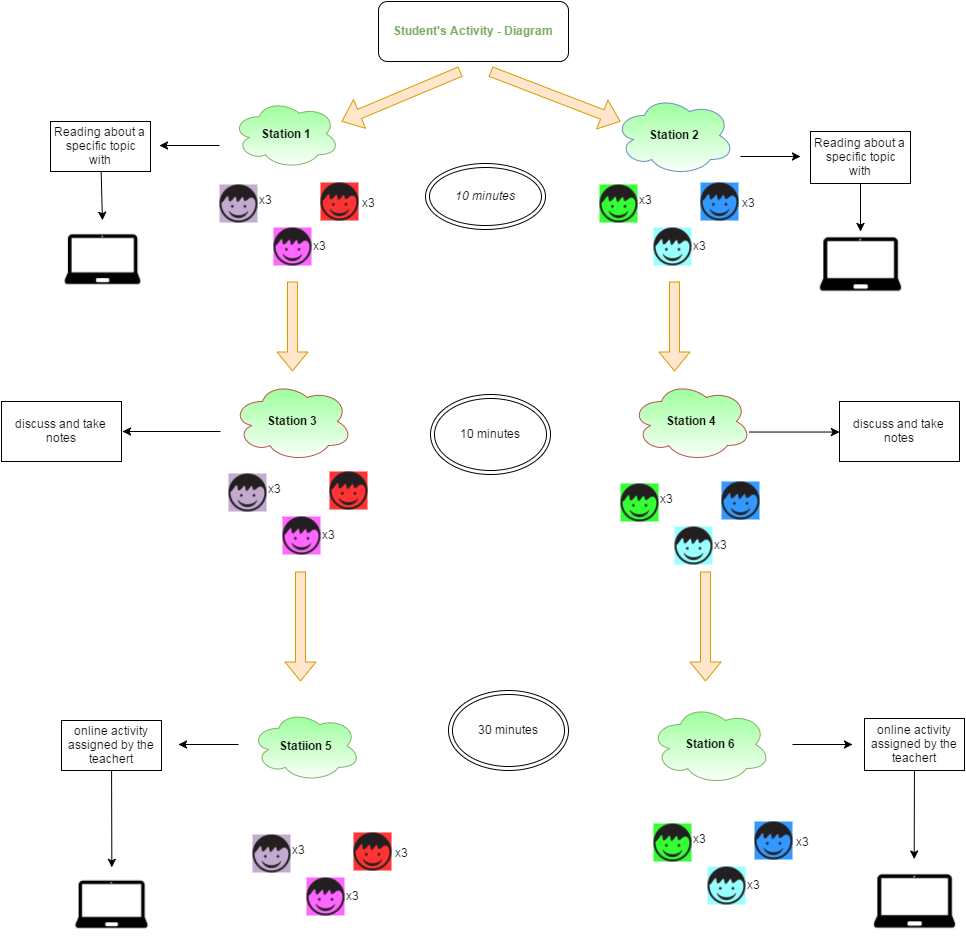
Because I have 18 students, I decided to duplicate the stations so that I would have six stations; that way, 9 students would start in stations one and two respectively, then move to stations 3 and 4 (in previously selected groups of 3) and then progress to stations 5 and 6. See figure below for a better grasp of stations organization.
The diagram that students were asked to create was based on the description of this specific duplicated sequence in-class flip in order to see how students could visualize the same method they were working in. Here are the instructions they were given.
This is the description they had to convert into a diagram:
<<The classroom is organized in 6 stations. In station 1 and 2, students are placed in *groups of 3 and will be working on an explanation of a topic through an online reading with laptops. They only have 10 minutes. There are nine students in each of the stations. Then, students are asked to go to stations 3 and 4 in the same groups. They are given an activity they must discuss as a group. Students take notes in their notebooks. They have 10 minutes. Finally, students pass to stations 5 and 6 in the same groups that had worked on the previous ones. Each group must work with one laptop and complete an activity assigned by the teacher. For this activity, they have 30 minutes.>>
*The only difference from the real class dynamic is that in the description, in stations 1 and 2 students were placed in groups of 3 instead of in individual work mode.
Check out their final creations:


Moreover, as a way to encourage peer correction and collaborative learning, I provided students with a checklist in order for them to vote for the best diagram, which was very similar to the diagram-checklist created to grade them. The winning group got bonus points for a future grade.
This was the winning diagram – which included absolutely all the criteria:
This is the first time I try out a sequenced in-class flip and duplicate the stations. So in this first attempt the following occured:
- Students arrived 8 minutes late to class (which does not usually occur – Murphy’s law, right?), so even though I had planned the flip for ten minutes less, this situation lead to continuing the work of station 3 in the next class.
- Some laptops in the individual exercise had issues with wifi, so some students ended up working in pairs or groups of 3, which was fine.
- I used an online timer and displayed it through a video projector for students. This allowed timing to be kept and followed. When time was up, an alarm sounded and Ss were asked to move on to the next station. This was a good move. I think visualizing time helps students and the teacher stay on track and maintain an appropriate pace.
- I wrote the names of each group and placed it in a post-it on the stations; that way, each group knew where they had to sit. I believe this saved valuable time.
- When students went from stations 1 and 2 to stations 3 and 4 to work in groups, I assigned one person in the group to take the laptop to the following station. This made the logistics of moving computers organized, but when students were to move to the last stations, to actually work on the laptops, I did not see the use of them moving, since they were going to work in the same groups and had the laptop with them already. Therefore, they did the work of station 5 and 6 in the same place they were already at (station 3 and 4).
- Providing a tutorial for how to use the online tool for creating diagrams showed to be successful, since no students asked how to actually access the tool. This allowed me to monitor and clarify specific doubts regarding the use of the tool itself.
- Students understood and enjoyed the activity!
All in all, I have to say I was surprised by how well students worked and by how appropriate the dynamic of sequenced duplicated stations was for this particular class. I was also amazed by how different each group visualized their diagrams. They all did a great job! They understood what they had to do and they were focused on the task while I focused on monitoring and providing support and feedback when needed. I think I’ll definitely use this same dynamic for teaching them how to display data, including everything this experience taught me. I loved it!